Git的研究和使用总结
Git的安装和配置
-

-
配置环境变量
-
检验安装成功

-
配置全局信息
1
2
3
git config --global user.name "RobKing" //用户名 git config --global user.email "2768817839@qq.com" //邮箱 git config -l //查看全局信息


配置代理
git config --global https.proxy http://127.0.0.1:7890 //配置代理git config --global --unset http.proxy //取消http代理
Git指令的使用
git log查看commit日志

git log --oneline --graph --decorate --all查看节点树

git reset --hard commit_id回退到指定id (指定版本)

此操作结束之后 本地代码和远程仓库代码 都会回退到 原来的版本
-
git reset --hard origin/dev取消当前改动(回退指定id的改动),重置到库的最新版本(取消回退)

将项目上传到Github上
-
进入
Github首页,点击New repository新建一个项目(添加一个Readme) -
在项目的根路径下
git clone+ 项目名(下载指定分支 git clone -b dev ***) -
更新代码提交
-
git add . -
git commit -m "first commit" -
git push origin master(main)
-


本地项目与Github同步
添加SSH KEY
-
ssh-keygen -t rsa -C “2768817839@qq.com”成功生成
SSH key了,可以到C:/Users/你的用户账号/.ssh文件夹下看Linux下可以cd ~./ssh -
复制
.ssh文件夹下id_rsa.pub文件的内容添加到github -
测试
ssh连接


关联本地库和远程库
-
git remote add origin git@github.com:RobKing9/CargoManageSystem.git -
如果
ssh被占用 将导致或者如果项目是http协议 -
需要删除远程
git仓库,执行git remote rm origin -
执行指令
git remote -v查看当前情况


拉取最新代码

参看版本差异可直接 git log -p master
Git分支管理
-
将远程仓库的分支信息拉取到本地仓库
git fetch -
在本地创建新分支
git branch [分支名] -
切换分支
git checkout [分支名] -
git branch 查看本地分支
-
git branch -a 查看所有分支
-
git checkout -b main origin/main创建并切换分支 -
删除分支


本地:git branch -d master
远程库:git push -d origin master或者git push origin :master

.gitignore文件的使用
如果项目已经push上去了 但是没有忽略 ,增加 .gitignore 文件
.gitignore只能忽略那些原来没有被track的文件,如果某些文件已经被纳入了版本管理中,则修改.gitignore是无效的。
解决方法就是先把本地缓存删除(改变成未track状态),然后再提交:
git rm -r --cached .

-
再次执行
git add . -->git commit -m "update .gitignore" --> git push origin dev -
 1
 2
 3
 4
 5
 6
 7
 8
 9
10
11
12
13
14
15
16
17
18
19
20
21
22
23
24
25
26
27
28
29
30
31
32
33
34
35
36
37
38
39
40
41
42
43
44
45
46
47
48
49
*.a 表示忽略所有 .a 结尾的文件 !lib.a 表示但lib.a除外 /TODO 表示仅仅忽略项目根目录下的 TODO 文件,不包括 subdir/TODO build/ 表示忽略 build/目录下的所有文件,过滤整个build文件夹; .idea/ doc/*.txt 表示会忽略doc/notes.txt但不包括 doc/server/arch.txt bin/: 表示忽略当前路径下的bin文件夹,该文件夹下的所有内容都会被忽略,不忽略 bin 文件 /bin: 表示忽略根目录下的bin文件 /*.c: 表示忽略cat.c,不忽略 build/cat.c debug/*.obj: 表示忽略debug/io.obj,不忽略 debug/common/io.obj和tools/debug/io.obj **/foo: 表示忽略/foo,a/foo,a/b/foo等 a/**/b: 表示忽略a/b, a/x/b,a/x/y/b等 !/bin/run.sh 表示不忽略bin目录下的run.sh文件 *.log: 表示忽略所有 .log 文件 config.php: 表示忽略当前路径的 config.php 文件 /mtk/ 表示过滤整个文件夹 *.zip 表示过滤所有.zip文件 /mtk/do.c 表示过滤某个具体文件 被过滤掉的文件就不会出现在git仓库中(gitlab或github)了,当然本地库中还有,只是push的时候不会上传。 需要注意的是,gitignore还可以指定要将哪些文件添加到版本管理中,如下: !*.zip !/mtk/one.txt 唯一的区别就是规则开头多了一个感叹号,Git会将满足这类规则的文件添加到版本管理中。为什么要有两种规则呢? 想象一个场景:假如我们只需要管理/mtk/目录中的one.txt文件,这个目录中的其他文件都不需要管理,那么.gitignore规则应写为:: /mtk/* !/mtk/one.txt 假设我们只有过滤规则,而没有添加规则,那么我们就需要把/mtk/目录下除了one.txt以外的所有文件都写出来! 注意上面的/mtk/*不能写为/mtk/,否则父目录被前面的规则排除掉了,one.txt文件虽然加了!过滤规则,也不会生效! ---------------------------------------------------------------------------------- 还有一些规则如下: fd1/* 说明:忽略目录 fd1 下的全部内容;注意,不管是根目录下的 /fd1/ 目录,还是某个子目录 /child/fd1/ 目录,都会被忽略; /fd1/* 说明:忽略根目录下的 /fd1/ 目录的全部内容; /* !.gitignore !/fw/ /fw/* !/fw/bin/ !/fw/sf/ 说明:忽略全部内容,但是不忽略 .gitignore 文件、根目录下的 /fw/bin/ 和 /fw/sf/ 目录;注意要先对bin/的父目录使用!规则,使其不被排除。
git commit message 编写指南
Head+Body+Footer ;Head: type • feat:新功能(feature) • fix:修补bug • docs:文档(documentation) • style: 格式(不影响代码运行的变动) • refactor:重构(即不是新增功能,也不是修改bug的代码变动) • test:增加测试 • chore:构建过程或辅助工具的变动
scope subject
使用tree命令生成项目目录树
-
下载
tree命令的二进制包,安装tree命令工具;地址,选择下载Binaries zip文件 -
解压压缩包,找到压缩包内的
bin目录,将bin目录下的tree.exe复制; -
找到
Git的Bin目录,将 tree.exe 粘贴到该目录下,安装即完成 -
tree -L 5 -I "node_modules|dist|dist.zip" >tree.txt将目录结构导出

使用Git遇到的Bug及解决方法
解决git clone速度慢的方法
//这是我们要clone的
git clone https://github.com/Hackergeek/architecture-samples
//使用镜像
git clone https://github.com.cnpmjs.org/Hackergeek/architecture-samples
//或者使用镜像
git clone https://git.sdut.me/Hackergeek/architecture-samples
几个可用的镜像源
https://hub.fastgit.org](https://hub.fastgit.org/)https://github.com.cnpmjs.org](https://github.com.cnpmjs.org/)https://github.bajins.com](https://github.bajins.com/)https://github.rc1844.workers.dev](https://github.rc1844.workers.dev/)
合并代码遇到error: Your local changes to the following files would be overwritten by merge
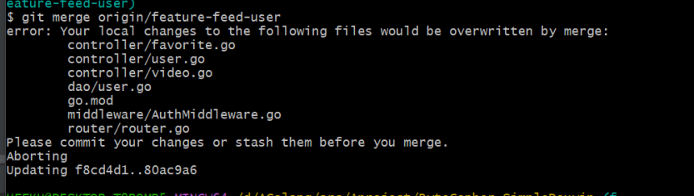
解决方法
- 执行
git stash本地刚才修改的代码将会被暂时封存起来
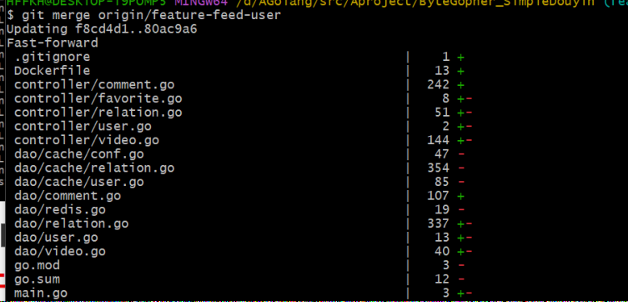
git merge origin/feature-feed-user重新合并
-
git stash pop服务器上的代码更新到了本地,而且你本地修改的代码也没有被覆盖

提交代码遇到To github.com:RobKing9/ByteGopher_SimpleDouyin.git ! [rejected] dev -> dev (non-fast-forward)
error: failed to push some refs to ‘github.com:RobKing9/ByteGopher_SimpleDouyin.git’

解决方法
说明远程仓库的代码比本地先更新 遇到了冲突 无法提交
-
首先把远程仓库最新的代码拉下来 (参考上面 本地项目与
Github同步的拉取代码) -
手动解决冲突 留下需要的代码 删除不需要的
-
再次执行
git add . -->git commit -m "" --> git push origin dev


git-修改commit信息
添加远程仓库遇到fatal: unsafe repository (‘D:/AGolang/src/Aproject/ByteGopher_SimpleDouyin’ is owned by someone else)

解决方法
git config --global --add safe.directory *- 参考链接